
 Save
Save
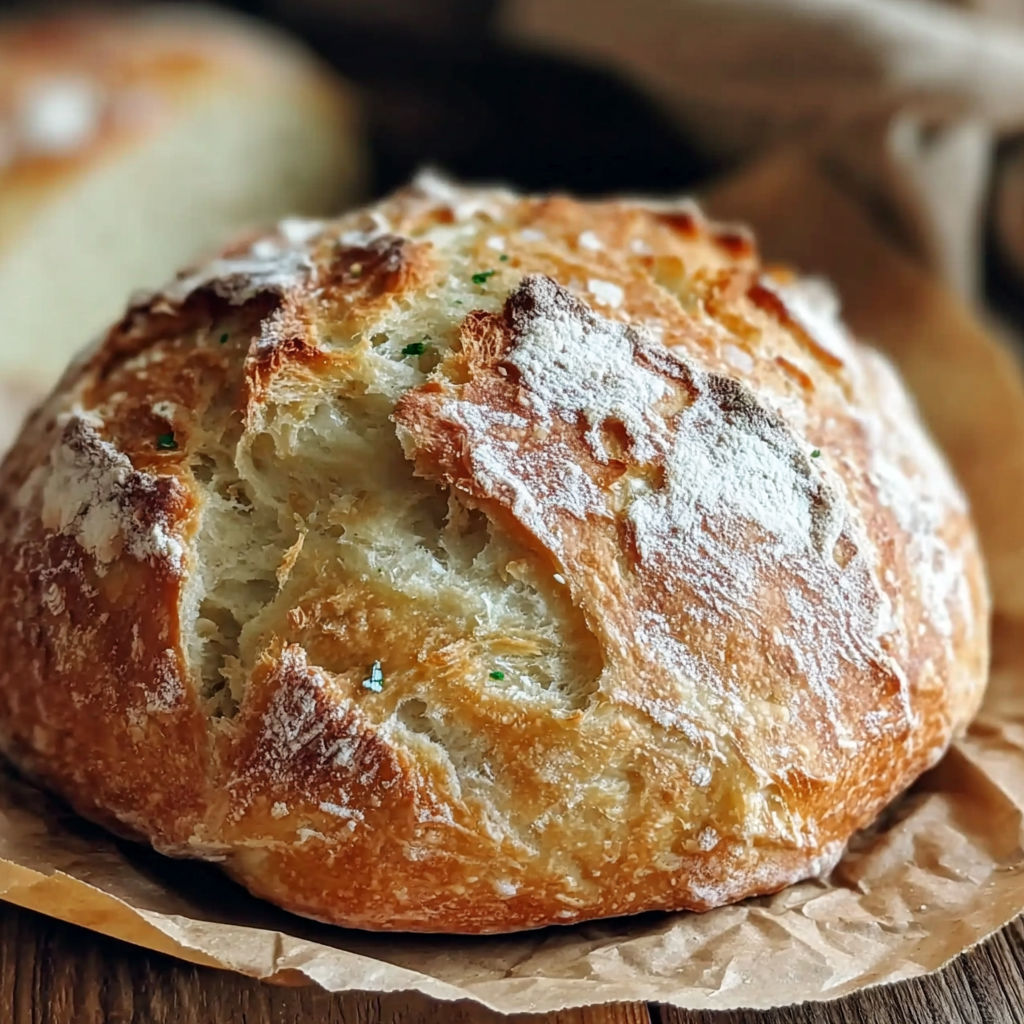
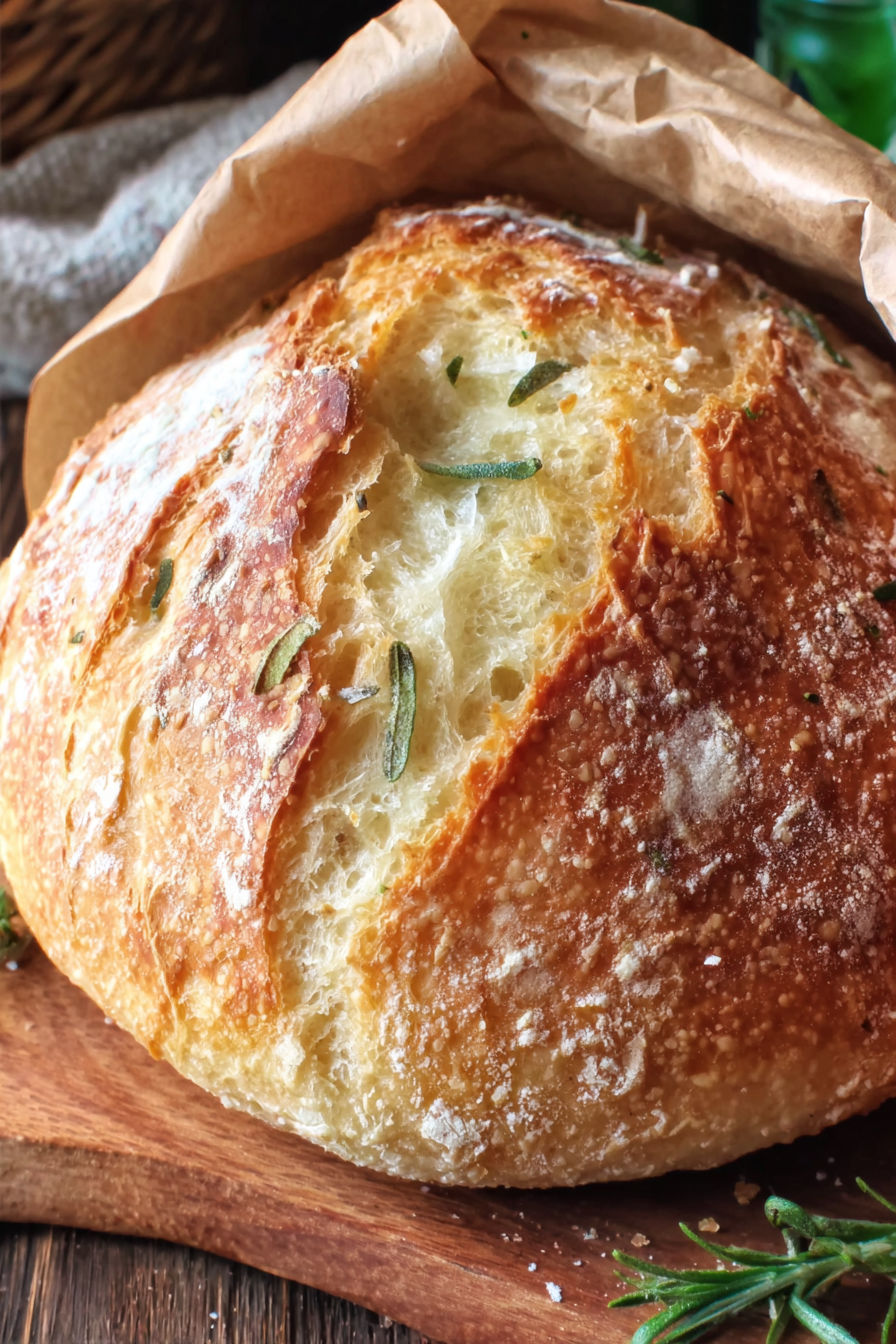
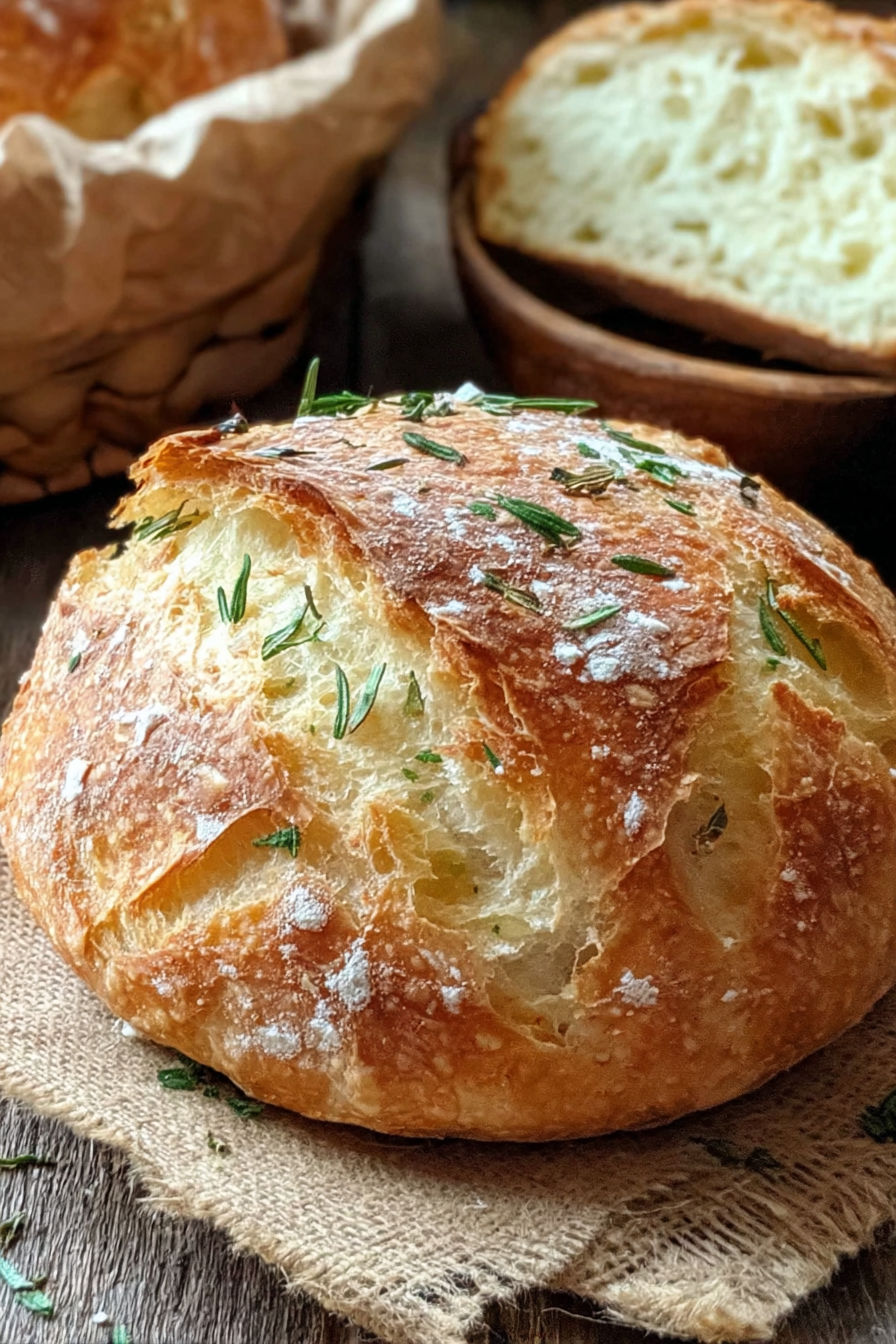
This crusty Italian bread recipe delivers a golden, chewy loaf with a perfect crunchy crust that pairs wonderfully with everything from olive oil dips to hearty soups. It’s a simple, satisfying recipe that brings the aromas and warmth of an Italian bakery right to your kitchen.
I remember the first time I baked this bread during a chilly weekend and how the smell filled the house. Now it’s a go-to whenever I want fresh bread without the fuss of complicated techniques.
Ingredients
- All-purpose flour: 3 and a half cups or 450 grams, the foundation of your bread choose a high-quality, unbleached flour for better texture
- Salt: 2 teaspoons, essential for flavor balance and controlling yeast activity
- Instant yeast: 1 and a half teaspoons, offers a reliable and quick rise make sure it is fresh for best results
- Warm water: 1 and a half cups at about 110 degrees Fahrenheit to activate the yeast gently without killing it
Instructions
- Sift and Combine Dry Ingredients:
- In a large mixing bowl, measure out the flour, add the yeast, and salt. Mix them thoroughly to ensure yeast and salt are evenly distributed, which helps with even fermentation and flavor.
- Add Warm Water Gradually:
- Slowly pour in the warm water while stirring with a wooden spoon. Aim to create a sticky, shaggy dough that is moist but not overly wet. This initial mix sets the hydration level for your bread.
- First Rise:
- Cover your mixing bowl tightly with plastic wrap or a damp towel to trap warmth and moisture. Leave the dough in a cozy, draft-free spot for 1 to 2 hours. You want the dough to double in size, which means the yeast is working and your bread will rise beautifully.
- Shape the Dough:
- Turn the dough out onto a lightly floured surface and gently nudge it into a round shape. Be careful not to overwork the dough here as that can toughen the bread. This shaping creates the signature rustic look.
- Second Rise:
- Place your shaped dough on a piece of parchment paper. Cover it with a towel again and let it rest for 30 minutes so it can puff up slightly, preparing it for the oven. Meanwhile, preheat your oven to 450 degrees Fahrenheit and place your Dutch oven inside to heat thoroughly.
- Bake Covered:
- Using oven mitts, transfer the parchment paper with the dough carefully into the hot Dutch oven. Cover with the lid and bake for 30 minutes. The covered baking creates steam that helps develop the crust.
- Bake Uncovered:
- Remove the lid and continue baking for another 10 to 15 minutes. This is when the crust becomes beautifully golden and crunchy.
- Cool Before Slicing:
- Remove the bread from the oven and transfer it to a wire rack. Let it cool completely to set the crumb and prevent squashing the bread when you slice.
What I love most about this bread is the simplicity of just flour, water, yeast, and salt transforming into a crusty, aromatic loaf. One of my favorite memories is tearing chunks warm from the oven at a family gathering, where everyone marvels at how bakery-quality bread can be so easy to make at home.
Storage Tips
To keep the crust crisp, store bread loosely wrapped in a clean kitchen towel at room temperature for up to two days. Avoid airtight containers or plastic bags that trap moisture and soften the crust. For longer storage, slice and freeze the bread wrapped tightly in foil or freezer bags. Thaw at room temperature or briefly toast slices for a fresh-baked taste.
Ingredient Substitutions
You can swap all-purpose flour with bread flour for a slightly chewier texture due to higher gluten content. Use active dry yeast instead of instant yeast but dissolve it first in warm water and allow it to bloom before mixing. Sea salt or kosher salt can replace table salt just remember to adjust the quantity as they differ in grain size.
Serving Suggestions
This bread shines alongside soups like tomato basil or minestrone. It’s perfect for bruschetta topped with fresh tomatoes and basil or for dipping in flavored olive oils. Slices toasted with garlic butter make a delicious accompaniment to pasta or salad dishes.
Seasonal Adaptations
In cooler months, proof the dough in a warm spot like near a radiator or inside a turned-off oven with the light on for steady rising. During summer, rise times will be faster due to warmth, so keep an eye on the dough to avoid over-fermentation. For a seasonal twist, consider adding herbs or olives to the dough during shaping.
This bread recipe is straightforward yet yields a bakery-quality crusty loaf. Enjoy the process and the delicious results.
FAQs about Recipes
- → What type of flour is best for this bread?
All-purpose flour works well, providing the right balance for a tender crumb and sturdy crust.
- → How does the Dutch oven affect baking?
Using a Dutch oven traps steam, helping the bread develop a crispy crust and moist interior.
- → Can I use active dry yeast instead of instant yeast?
Yes, but activate active dry yeast in warm water beforehand for best results.
- → Why is the dough covered during rising?
Covering retains moisture and warmth, promoting proper yeast fermentation and dough expansion.
- → How long should the bread cool before slicing?
Allow the loaf to cool completely on a wire rack, usually about 1 hour, to finish setting the crumb.