
 Save
Save
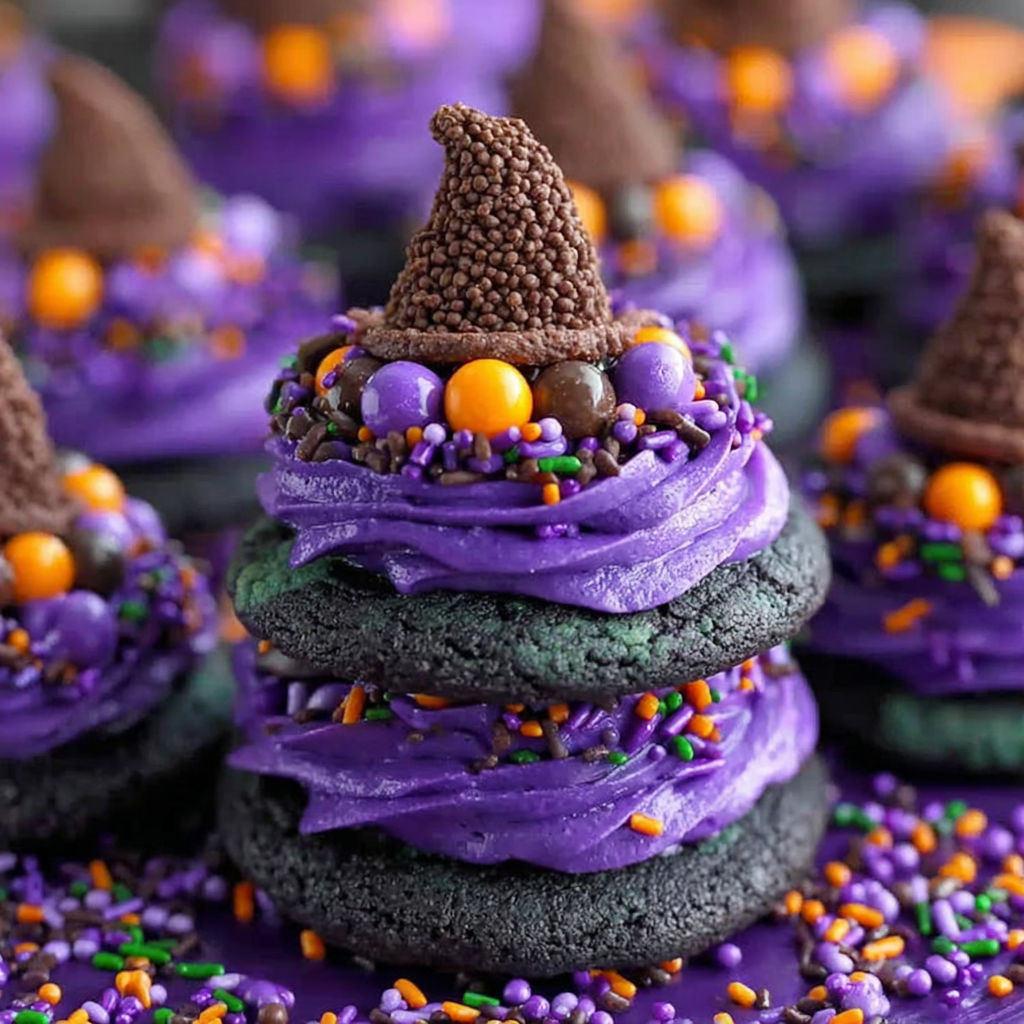
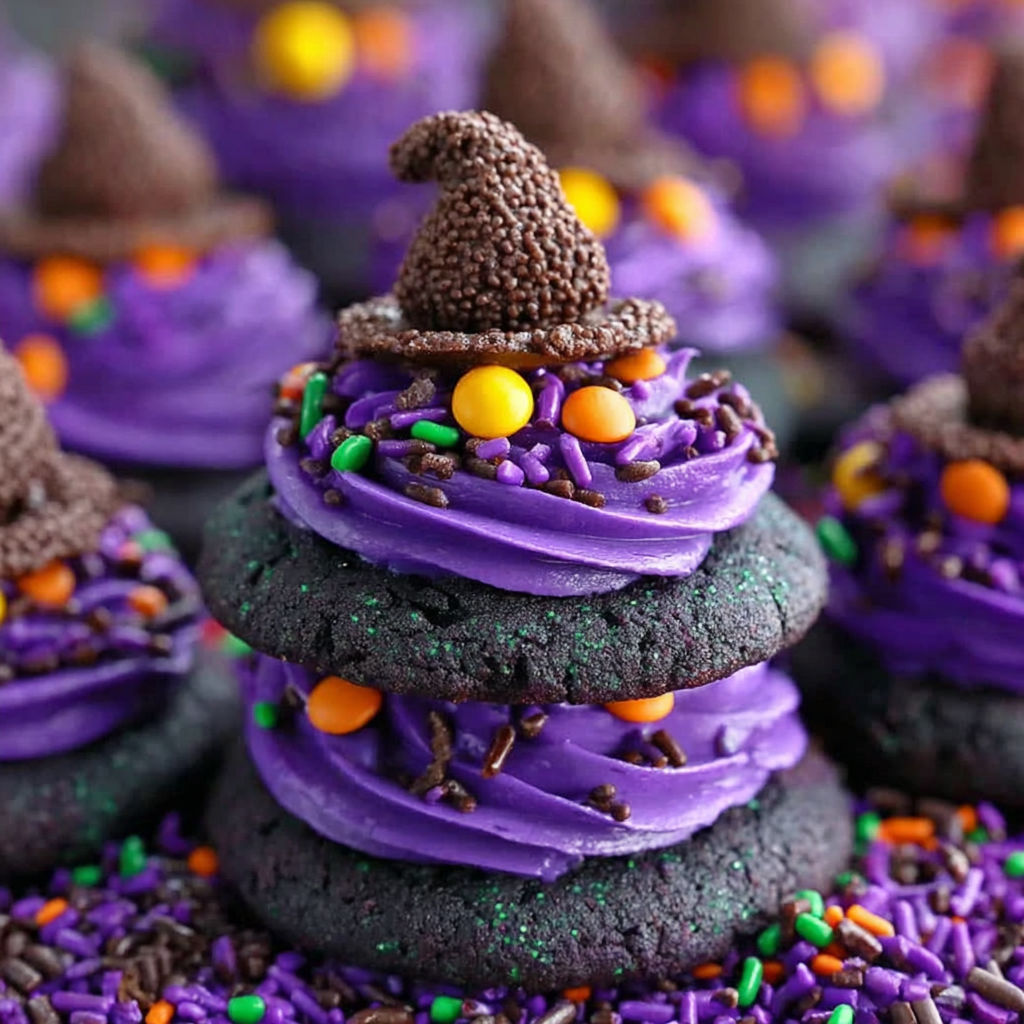
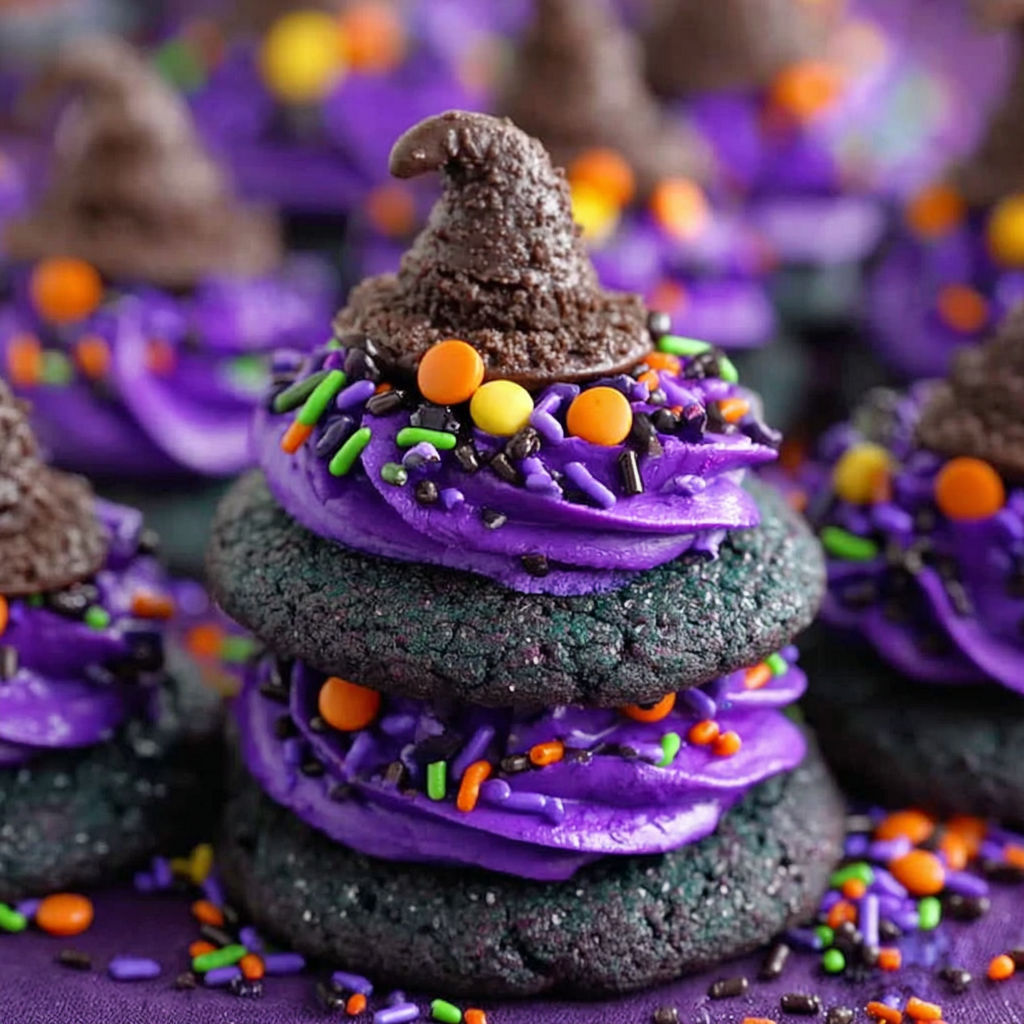
These Best Witch Hat Halloween Cookies are the perfect treat to bring spooky magic to your holiday table. With a rich peanut butter base colored in vibrant purple and topped with chocolate kisses, they deliver both festive fun and irresistible flavor. The texture is just right with a soft center and slightly crisp edges, making these cookies a memorable hit at any Halloween gathering.
I first made these during a Halloween party a few years ago and now they are a must-bake in my family every October. The kids love rolling the dough and adding sprinkles, and the witch hat shape never fails to impress guests.
Ingredients
- All-purpose flour: for structure the main cookie base
- Cornstarch: to keep cookies soft and tender
- Baking soda and baking powder: for the perfect rise and light texture
- Fine sea salt: to enhance the flavors and balance sweetness
- Unsalted butter: softened to create a creamy dough and rich flavor choose high quality butter for best results
- White sugar: for sweetness and to help with cookie crispness
- Large egg: to bind the ingredients
- Smooth peanut butter: adds delicious nuttiness and moisture opt for natural peanut butter for richer taste
- Vanilla extract: for warm undertones
- Purple gel food coloring: to give the dough an eye-catching Halloween hue gel is best as it won’t thin the dough
- Halloween sprinkles or purple sanding sugar: for fun festive decoration
- Chocolate kisses or Hugs candies: to create the witch hat top choose good quality chocolate for best melting and flavor
Instructions
- Sift and combine dry ingredients:
- Whisk together the all-purpose flour cornstarch baking soda baking powder and fine sea salt until completely blended and set aside for later
- Cream butter sugar and egg:
- Using an electric mixer cream the softened unsalted butter and white sugar on medium speed for 2 minutes until light fluffy then add the large egg mixing until fully incorporated
- Add peanut butter and vanilla:
- Mix in the smooth peanut butter and vanilla extract carefully scraping down the bowl to incorporate everything evenly for a uniform dough
- Mix in dry ingredients and color the dough:
- Gradually stir the dry ingredients into the wet mixture until a smooth dough forms then add purple gel food coloring a little at a time mixing well to reach an even shade without streaks finish mixing by hand if needed
- Portion and chill the dough:
- Using a tablespoon scoop portion the dough into mounds placing them close but not touching on parchment-lined sheet tray cover with plastic wrap and refrigerate for at least 2 hours preferably overnight so cookies bake thick and do not spread
- Prepare for baking and coat dough balls:
- Preheat oven to 350 degrees Fahrenheit line new sheet trays with parchment pour sprinkles or sanding sugar into a small bowl roll each chilled dough mound into a smooth ball and coat thoroughly in the sprinkles or sanding sugar arrange on prepared trays at least 2 inches apart
- Bake cookies until puffed and cracking:
- Bake for 9 to 11 minutes until cookies are puffed and beginning to crack on top I like to slightly underbake so they remain soft inside as they cool
- Add chocolate candy tops and chill:
- Remove cookies from oven let cool for 5 minutes then gently press one unwrapped chocolate kiss or Hug candy into the center of each cookie immediately transfer the trays to the freezer for 10 minutes to prevent chocolate melting from residual heat
- Cool completely and store:
- After freezing transfer cookies to a wire rack to finish cooling completely then store in an airtight container for freshness
Peanut butter is my favorite ingredient here. It gives the cookies a deep rich flavor and moist texture that keeps them satisfying bite after bite. One year my kids and I spent an afternoon making these together and decorating them while watching spooky movies it quickly became a cherished tradition.
Storage tips
Store these cookies in an airtight container at room temperature for up to one week for best freshness or freeze in a sealed container for longer storage. When freezing wrap cookies individually in parchment to keep them from sticking.
Ingredient substitutions
You can swap peanut butter for almond butter or sunflower seed butter for a different nutty flavor. If you prefer dairy-free opt for a plant-based butter substitute but keep it softened for easy creaming. Use natural food coloring alternatives if you want to avoid gels.
Serving suggestions
These cookies pair wonderfully with a glass of cold milk or warm spiced cider for fall. Try serving them on a Halloween party platter alongside other themed treats like ghost-shaped meringues or pumpkin-shaped brownies for a festive spread.
These Witch Hat Halloween Cookies combine festive looks with delicious flavor making them an unforgettable treat for October festivities.
FAQs about Recipes
- → What gives the cookies their purple color?
Purple gel food coloring is added to the dough and mixed thoroughly to create an even, vibrant hue.
- → Why should the dough be chilled before baking?
Chilling the dough firms it up, preventing excessive spreading and ensuring thick, soft cookies.
- → Can I use other toppings besides Halloween sprinkles?
Yes, sanding sugar or any colorful sprinkles can be used to coat the cookie dough before baking.
- → How do I prevent the chocolate kiss from melting?
Press the chocolate into the warm cookie and immediately freeze the tray for 10 minutes to set it firmly.
- → What texture do these cookies have?
These cookies have a soft interior with a slight crack on top, thanks to the proper balance of chilling and baking time.