
 Save
Save
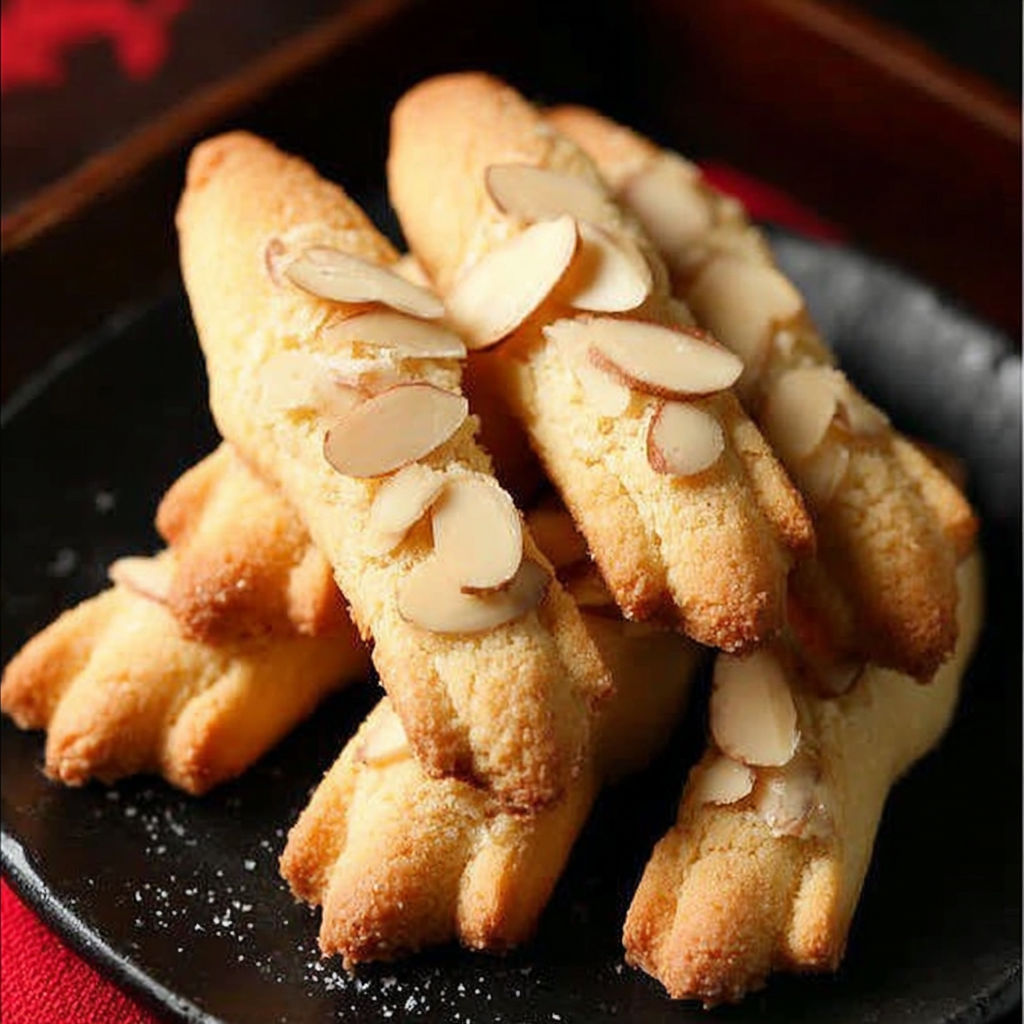
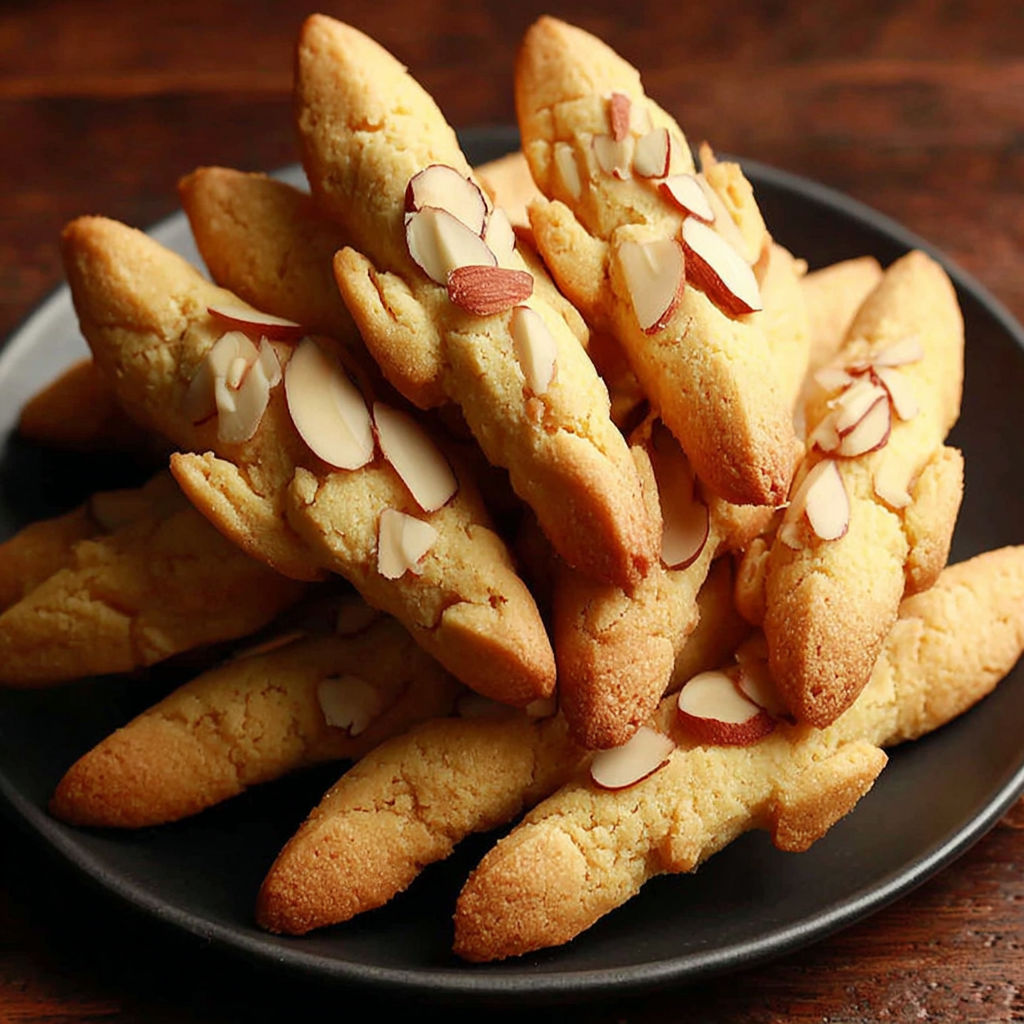
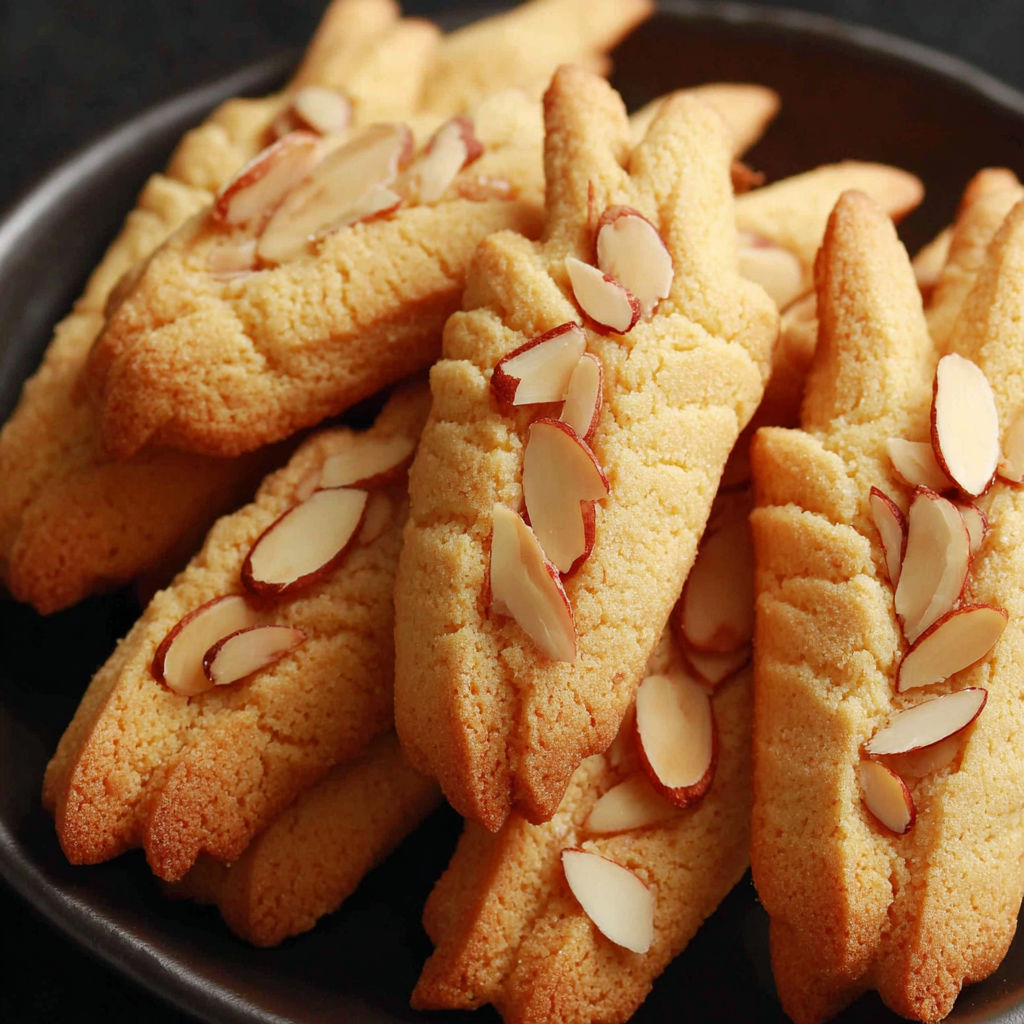
Every Halloween my kitchen fills with the sweet aroma of these Shortbread Witches Fingers and their spooky charm never fails to delight trick or treaters and grown ups alike They are buttery crisp cookies spiced with cinnamon and decorated to look just like eerie witch fingers making them a fun project for families who want an impressive yet easy holiday treat
The first time I made these for my neighbors Halloween party the platter disappeared in minutes Kids kept coming back for second fingers and adults were just as enchanted The cookies taste as good as they look
Ingredients
- All purpose flour: Adds structure to the cookie Look for fresh flour without any musty aroma
- Ground cinnamon: Brings warmth and autumn flavor Use true cinnamon for the best depth
- Kosher salt: Balances sweetness and makes each ingredient pop Choose a fine grain that dissolves easily in dough
- Slivered almonds: Create the iconic pointed fingernail Only use fresh nuts for best color and crispness
- Unsalted butter: Gives the shortbread its flaky crumb Always use high quality butter for distinctive flavor
- Brown sugar: Adds a touch of molasses flavor Go for soft light brown sugar not dried out or hard
- Vanilla extract: Enhances the buttery notes Opt for pure vanilla over imitation for authentic taste
Instructions
- Cream the Butter and Sugar:
- Using an electric mixer or sturdy whisk beat brown sugar unsalted butter and vanilla extract for about two minutes until the mixture turns light and fluffy This step helps your cookies bake up tender and flavorful
- Mix in Dry Ingredients:
- Gently fold ground cinnamon all purpose flour and salt into the creamed mixture Stop mixing when the dough just starts to hold together to keep your cookies delicate not tough
- Shape and Form the Dough:
- Dump the dough onto a clean surface Use your hands to press it into a smooth square shape with no loose flour or dry bits
- Roll Out the Dough:
- Place a sheet of parchment on top or dust your rolling pin with flour Gently roll the dough into a rectangle aiming for between one quarter to one half inch thickness Even rolling prevents uneven baking
- Cut and Portion:
- With a sharp knife slice the rectangle in half lengthwise Then slice crosswise into long slim rectangles about half an inch wide This creates the classic finger shape
- Pinch and Detail the Fingers:
- Take each dough rectangle and pinch it three times along the length Each pinch forms a knuckle first pinch near the top then the middle and finally lower down
- Score Knuckle Lines:
- With a paring knife slice three shallow little lines over each bump to mimic authentic knuckles
- Add Almond Fingernails:
- Gently press a slivered almond at the very tip of each finger for a creepy realistic touch The almond should point slightly outward just like a real fingernail
- Chill for Texture:
- Arrange the shaped cookies on a parchment lined tray Cover and refrigerate for half an hour or up to three days Chilling prevents spreading and improves the cookie snap
- Preheat and Rest Before Baking:
- Heat oven to three hundred fifty degrees Fahrenheit about ten minutes before baking Take cookies out of the fridge and let the tray rest so they are not icy cold before entering the oven
- Bake to Perfection:
- Place cookies in the center of the oven for nine to eleven minutes Look for only the faintest golden color at the base Remove cookies before they completely brown for a classic shortbread look
- Cool down and Finish:
- Allow cookies to cool on their tray for a few minutes before transferring to a rack This lets them crisp and hold shape without crumbling too soon
My kids never fail to laugh when shaping the knuckles and sliding on the almond nails One year my youngest decorated a whole tray with red gel for extra spooky nails making them the hit of our neighborhood party
Storage Tips
Store cooled cookies in an airtight container at room temperature for up to one week If you plan on baking ahead or have leftovers stow them in the freezer in a ziptop bag and thaw at room temperature whenever a craving hits For best freshness stack fingers with sheets of parchment between layers
Ingredient Substitutions
Feel free to swap the brown sugar for granulated if needed though you will miss the extra molasses note Dairy free folks can use a quality vegan butter and the recipe still works fine For the nails pumpkin seeds or sunflower seeds are a neat allergy friendly variation and look just as spooky
Serving Suggestions
Pile these witch fingers on a black platter for a Halloween centerpiece Pair them with hot apple cider or tuck them into Halloween goody bags Wrapped in cellophane these make festive homemade gifts for friends and teachers
Cultural and Historical Context
Shortbread is a classic Scottish cookie known for its crisp crumb thanks to butter and just enough flour Witches fingers put a playful Halloween twist on this tradition by shaping them into hands straight from folklore It is a fun way to blend baking roots with spooky season whimsy
Seasonal Adaptations
Add a pinch of ground nutmeg for an even warmer autumn flavor Tint the almond nails green with natural food color for extra festivity Drizzle melted chocolate over the fingers for an indulgent variation
Success Stories
A friend who hates baking made these last year with her kids and was amazed at how foolproof they are Even when the shapes came out funny the cookies were still delicious and earned plenty of giggles Having made these dozens of times I find they have become a signature Halloween treat in my circle
Freezer Meal Conversion
Shape and chill the fingers then freeze on a tray Once frozen store in an airtight container and bake off straight from the freezer Bake a couple of minutes longer if needed This is my favorite way to prep for last minute guests or school parties
With these tips your Shortbread Witches Fingers will be the talk of your next Halloween party Have fun and make them your own
FAQs about Recipes
- → How do I shape the classic finger look?
Pinch the dough three times along its length to form knuckles, and add almond slivers to mimic fingernails for authenticity.
- → What gives these cookies their spooky color and detail?
Golden brown color comes from baking, while knuckle lines and almonds create lifelike finger details. Use a knife to score and define the knuckles.
- → Can I prepare the dough ahead of time?
Yes, shaped dough can be chilled for up to three days before baking to save time or enhance flavor and texture.
- → How do I ensure a crisp texture?
After baking, allow the cookies to cool fully on a wire rack. Chilling before baking also improves crispness.
- → Are substitutions possible for almond nails?
Sunflower or pumpkin seeds can replace almonds for nut-free versions while keeping the eerie appearance.