
 Save
Save
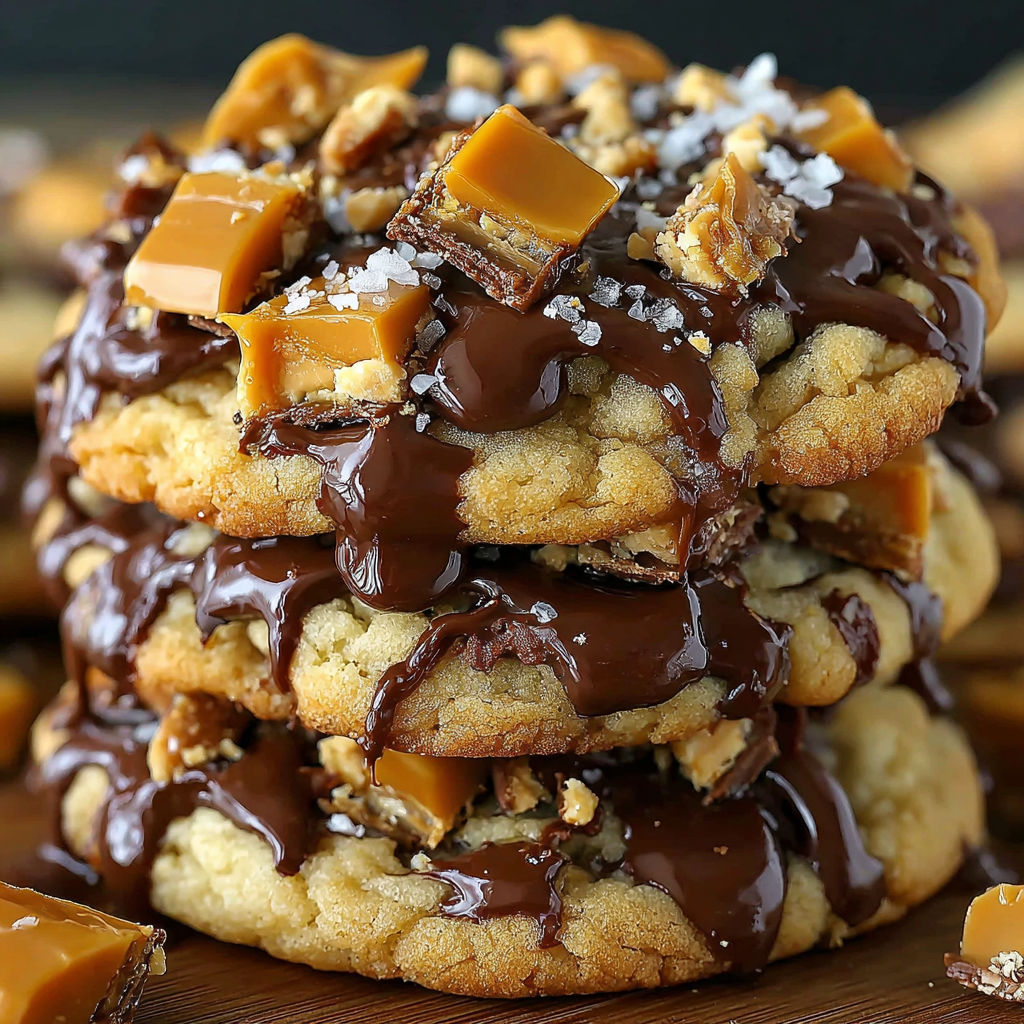
Butterfinger Caramel Crunch Cookies are the kind of bake-sale magic that disappear from the plate in minutes. Packed with caramel bits and big pockets of crushed Butterfinger bars, they hit every note crisp edges, chewy centers, sweet chocolate, salty peanuts.
I started baking these to use up leftover Halloween candy, but now they are a regular weekend treat everyone in my house craves. I first made these after my kids discovered a stash of Butterfinger bars we forgot about from trick or treating. Now they request them for every school party and family picnic and even my skeptical mother-in-law fights for the last cookie.
Ingredients
- Unsalted butter: use good quality butter for richer flavor and soft chewy texture
- Light brown sugar: gives depth adds moisture for a perfect chew
- Granulated sugar: helps the cookies spread for crisp golden edges
- Large eggs: bind everything and create a tender crumb
- Vanilla extract: adds a warm sweet aroma try to use real extract for best flavor
- All-purpose flour: forms the cookie base measure carefully for a balanced dough
- Baking soda: ensures the cookies rise and get slight lift
- Salt: highlights sweetness do not skip it
- Crushed Butterfinger candy bars: bring chocolatey peanutty crunch choose fresh bars for best results
- Caramel bits: create gooey sweet pockets look for soft caramel baking bits in the candy aisle
- Chopped peanuts: add salty crunch go for lightly roasted for more depth
- Sea salt flakes for topping: enhances flavor and balances the sweetness use flaky finishing salt
Instructions
- Preheat the Oven
- Start by setting your oven to three hundred fifty degrees Fahrenheit. Line a sturdy baking sheet with parchment paper or a silicone mat so the cookies come off clean and golden.
- Cream the Butter and Sugars
- Use a large mixing bowl and beat the softened butter with both brown and white sugars using a hand mixer or stand mixer. Keep mixing on medium for at least two to three minutes until you see the mixture turn light and fluffy. This gives the cookies a beautifully soft inside.
- Add the Eggs and Vanilla
- Crack in the eggs one at a time making sure to beat well after each one so the dough stays light. Add the vanilla extract and mix it in gently. You want a dough that smells rich and buttery.
- Mix Dry Ingredients
- In another bowl whisk together the flour baking soda and salt until everything is evenly combined. Gradually pour the dry mix into the wet mix using a mixer on low. Stop as soon as the dough is fully blended so you do not get tough cookies.
- Fold in the Add-Ins
- Gently use a spatula to mix in the crushed Butterfinger caramel bits and chopped peanuts. Stir just enough to distribute throughout without overworking the dough so every bite has a pocket of gooey crunch.
- Scoop the Dough
- Grab a cookie scoop or tablespoon to form even mounds of dough. Space them at least two inches apart on the prepared baking sheet so they do not bake into each other.
- Add Sea Salt and Bake
- Just before the pan goes in the oven sprinkle each cookie with a small pinch of flaky sea salt. Slide the pan onto the center rack and bake for ten to twelve minutes. Watch for the edges to turn golden brown while the centers stay soft and tender. Let cookies cool for at least five minutes on the baking sheet before moving them to a wire rack so they set up just right.
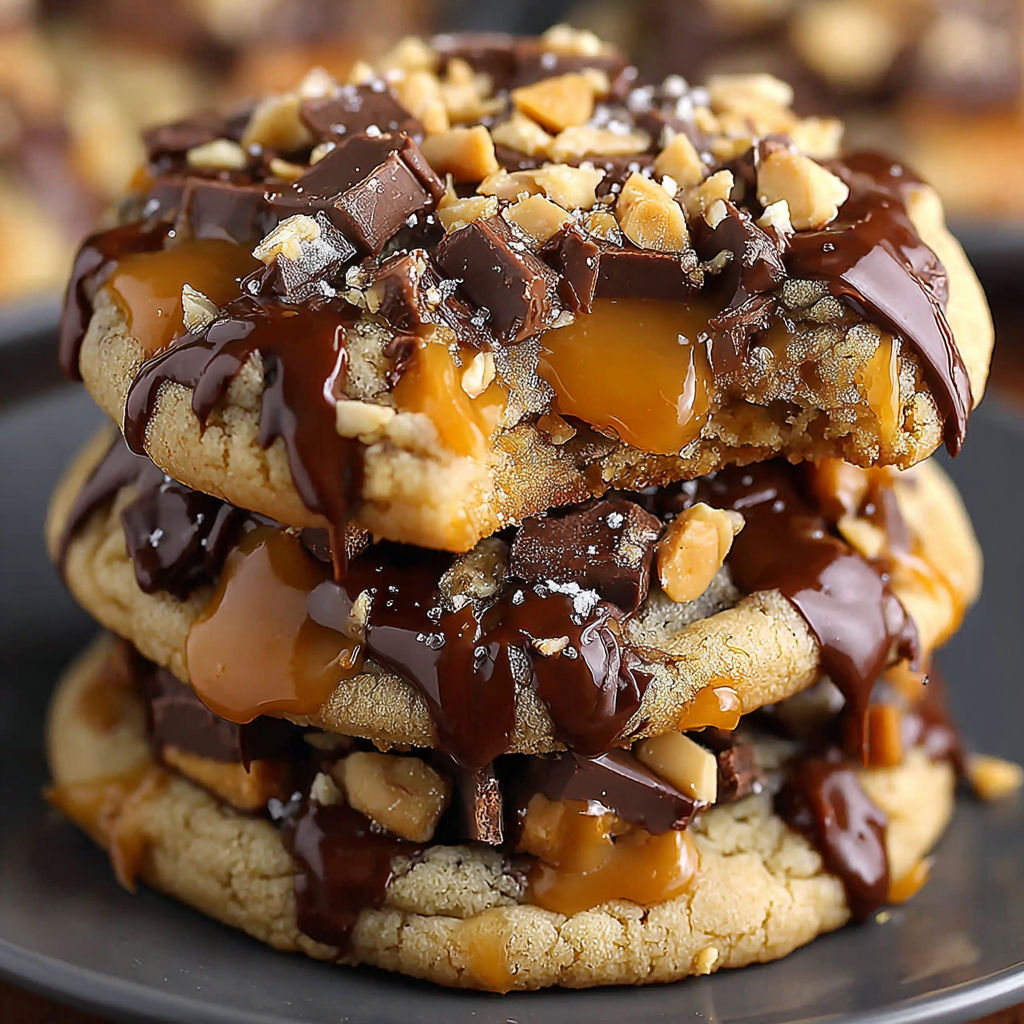
The caramel bits melt into gooey pockets that make each cookie a surprise and my favorite part is how the salty peanuts play off the sweetness. Last summer my kids and I made a triple batch and spent a Saturday assembling cookie sandwiches with ice cream an afternoon nobody wanted to end.
Storage Tips
Keep cookies in an airtight container at room temperature for up to four days. For quick lunchbox packing I portion a few into zip bags as soon as they cool. For longer storage freeze the raw dough balls on a tray then transfer to a bag. Bake straight from the freezer just add two minutes to the baking time.
Ingredient Substitutions
If peanuts are not your style swap in almonds cashews or pecans for crunch. Use a gluten-free flour blend cup for cup if needed and try a flaxseed egg for a plant-based version. You can use chocolate chunks or chopped toffee bars instead if you are out of Butterfingers though the flavor will change.
Serving Suggestions
Serve these cookies warm for gooey caramel or let them cool fully for crisp edges. Stack them around a bowl of vanilla ice cream or serve as an after baseball snack with a mini glass of cold milk.
Cultural and Seasonal Notes
Butterfinger bars are a classic American candy dating back to the 1920s when candy companies competed for the best snack. These cookies have become a tradition in my family at Halloween but they are crowd pleasers for summer cookouts too. For a fall twist add a pinch of cinnamon or swap in pumpkin spice. In spring press a pastel candy on top just before baking.

No matter how you serve them, these cookies disappear fast—save a few for yourself before they are gone! Make them once and they will become a family favorite all year round.
FAQs about Recipes
- → Can I use other nuts instead of peanuts?
Yes, feel free to swap peanuts with almonds, cashews, or pecans for a different flavor and crunch.
- → How do I keep the cookies soft?
Avoid overbaking; remove from the oven once the edges are lightly golden and centers look just set.
- → Are these suitable for gluten-free diets?
Yes, use a 1-to-1 gluten-free flour blend in place of all-purpose flour for gluten-free cookies.
- → What is the best way to crush Butterfinger bars?
Lightly crush bars in a sealed plastic bag with a rolling pin for small, crunchy pieces.
- → Can I make the dough ahead of time?
Absolutely. Chill dough in the fridge for up to 24 hours; let soften slightly before baking.